
Mapping Request Parameters
Introduction
In the vDesigner application, you can integrate different API to bind an action to different elements and controls. You can integrate two types of APIs, which are given as below:
- Sync API
- Other APIs
The sync API is specially used to insert the mobile app data into two tables: tb_cop_buss_obj_txn and tb_image_data_obj. The tb_cop_buss_obj_txn table stores the text and numeric data, while the tb_image_data_obj table stores image related data.
APIs that falls in the Other APIs category captures the response from third party server, apart from manipulating data on the database level such as fetching data from the database table. The database APIs are mainly used to retrieve the old data from the database tables. In the database APIs, internally implemented stored procedure executes and then calls corresponding service to perform the function.
To map request parameters:
To map request parameters:
- In the vDesigner application, locate the control/element (For example: – Submit (Bottom button)) where you want to integrate the API.
- To locate the control, locate the right navigation pane.
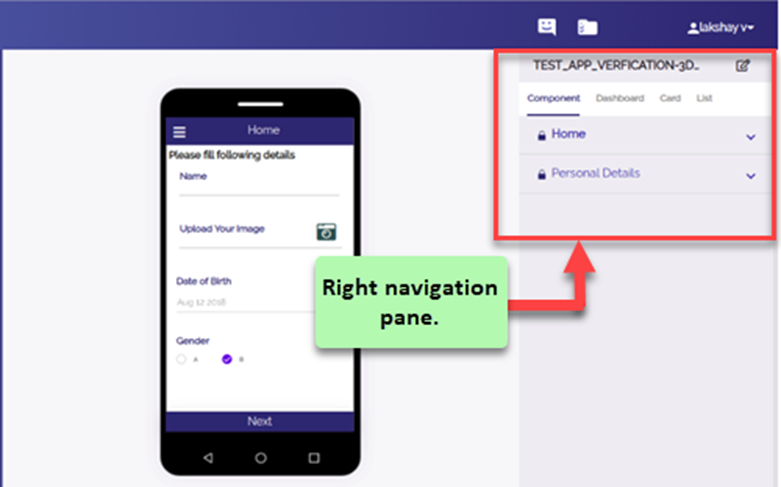
- In the right navigation pane, click the tab (For example: – Component) to locate the form/control where you want to integrate the API.
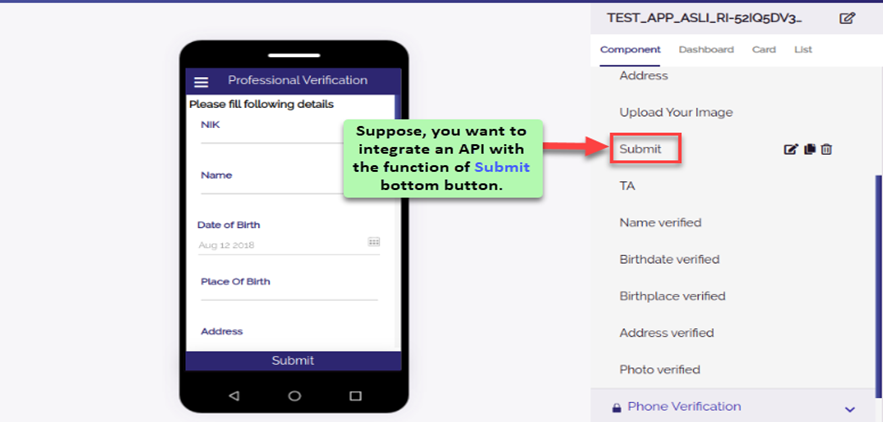
- After you locate the element/control (For example: – Submit), double-click the name of element in the right pane, and a dialog box (For example: – Bottom Button dialog box) opens.
- In the dialog box, click Edit Action, and the Action dialog box opens.
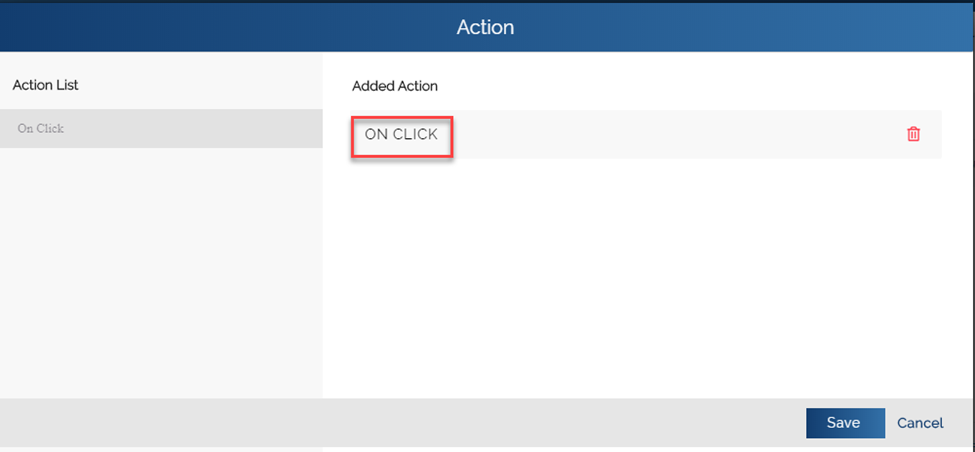
- In the Action dialog box, locate the Added Action area in the right pane.
- Under Added Action, click ON CLICK, and the Task dialog box opens.
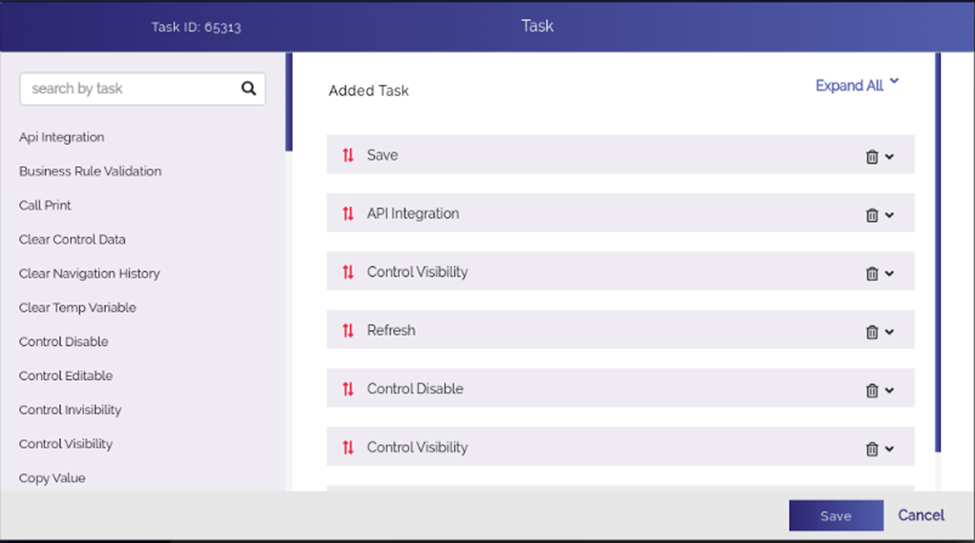
Note:- In the last screen capture, if you view the list of added tasks in the right pane, you will find that the Save task has been configured on the priority basis. The reason of configuring the Save task is described as below:
On a specific form, If you are taking input from the mobile app user and you want that the form continues to hold the input data after the user navigates to another page, you need to apply the Save task on the Next button or Submit button of that form where you have asked the user to enter the data.
- In the left pane, locate the Search by task box.
- In the Search by task box, enter API Integration.
- After you locate the Api Integration task, click it, and the Api Integration dialog box opens.
- In the Api Integration dialog box, click Parameter’s Mapping, and the Data Connect dialog box opens.
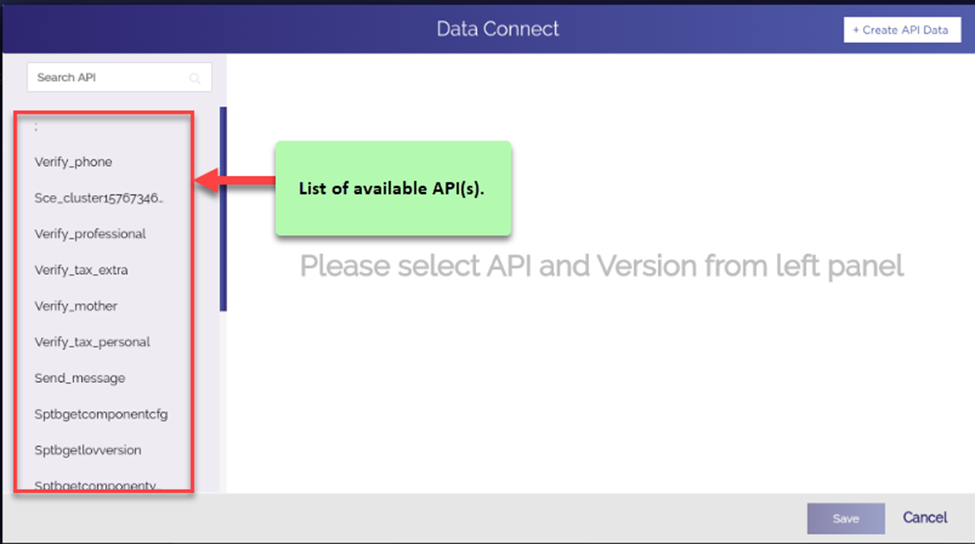
- In the Data Connect dialog box, the left navigation pane displays the list of available APIs that are deployed on the vConnect portal.
- In the Data Connect dialog box, search the API that you want to integrate.
- After you search and find the API (For example: – Verify_professional), click to select that API.
- After you select the Verify_professional API, click the API’s version number, and the right panel displays the Request Parameters and Response Parameters tabs.
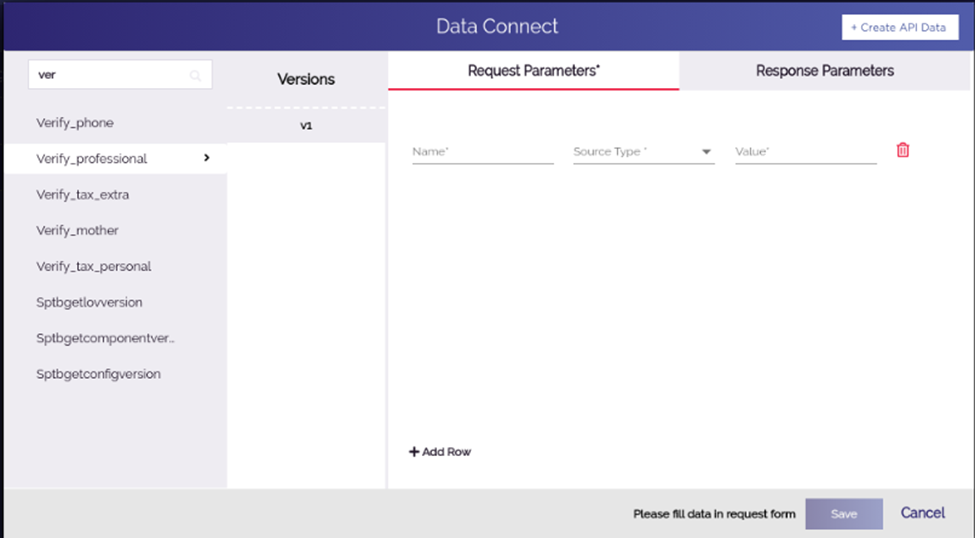
- Click the Request Parameters tab (If not selected).
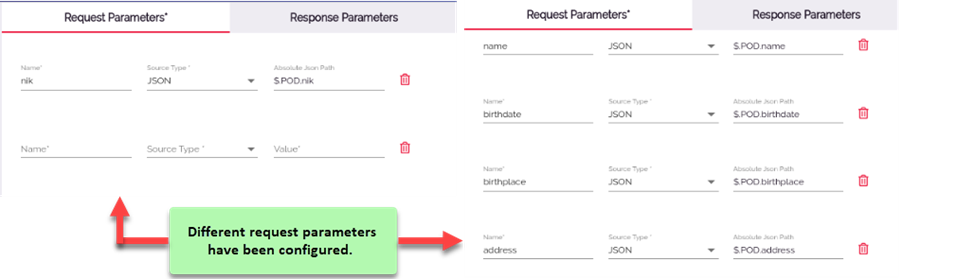
- The Request Parameters tab displays the following fields:
- Name
- Source Type
- Value
- In these fields, enter or select values as follows:
| Fields | Description |
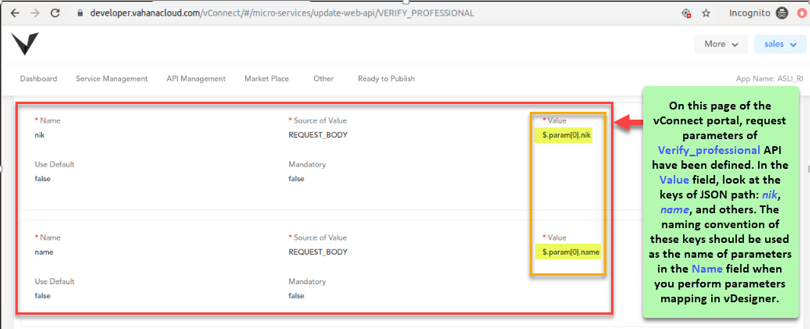
| Name | In this field, enter the name of parameter (For example: – nik or name). Note:- In the Name field, the parameter’s name must match with the parameter’s name that you define in the Value field on the vConnect portal. On the vConnect portal, you enter the name of parameter in the Value field when you define the template body parameter while configuring an API. |
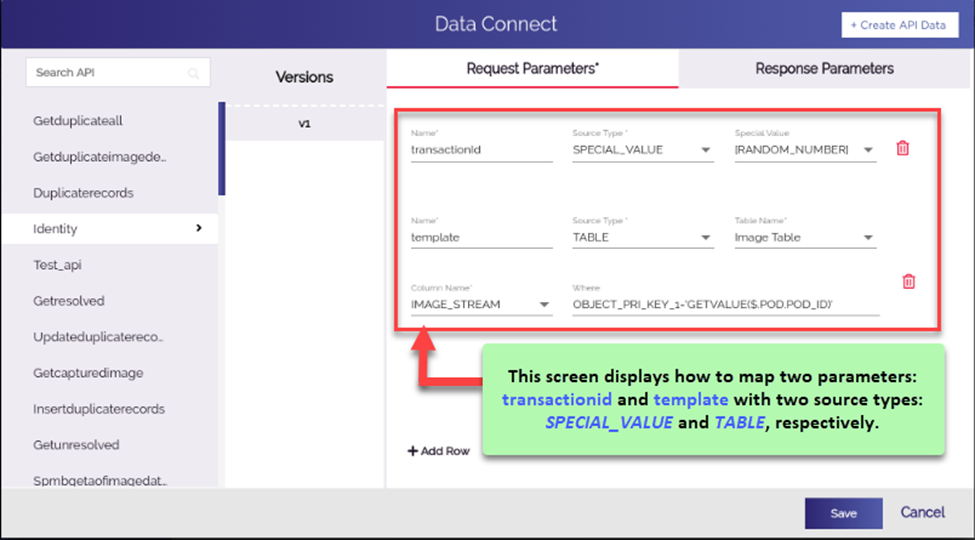
| Source Type | Click this list to select any of the following values: –> Special –> Value –> Fixed –> JSON –> Table –> Control Selecting any of these values as source type determines the type of data source or format from where the parameter will pick the data or in which insert the data. |
| Value | In this box, enter the value as follows. In the Source Type list, if: i. You select: Special Value In the Value box, enter hardcoded value: [Random_number]. In case of special value, the API will fetch the random number. ii. You select: Fixed In the Value box, enter any constant value that the respective parameter will store. iii. You select: JSON In the Value box, enter the json path (For example: – $.POD.nik). The API will pick the data from the JSON path. iv. You select: Table 1. Click the Table Name list and then select the table (For example: – Image Table) from where the API will fetch the data. 2. After you select the table, the Column Name list and the Where box appear. 3. Click the Column Name list and then select the column (For example:- Image_stream) from where API will fetch the data. 4. In the Where box, enter/write the where clause of the SQL query if you want that the API fetch the data from the selected column with special conditions. v. You select: Control In the Value/Control box, enter the control ID (For example: – 79229) of the control/element (For example: – Text box/Text field) from where API will pick the data and store in the respective parameter. |
- After you map the first parameter by following steps as described in the last table, map other parameters.
- To map other parameters, click Add Row, and another row of the following fields appears.
- Name
- Source Type
- Value
- In these fields, enter values to map next parameter as described in the last table.
- After you map all the request parameters, click Save, and the Data Connect dialog box closes.
- In the API Integration dialog box, click Save, and the API Integration dialog box closes.
- In the Task dialog box, click Save, and the Task dialog box closes.
- In the Action dialog box, click Save, and the Action dialog box closes.
- In the Bottom Button dialog box, click Save, and the Bottom Button dialog box closes, and thus all request parameters are successfully mapped.