Viewing Default Feature Branch
When you create an app on the Vahana cloud, it is by default created in the Feature_1 branch. While a new app is created in the Feature_1 branch, a master branch always exists parallel to the default Feature_1 branch. A vDesigner module user can work on the app in the Feature_1 branch and create its release, and then merge the release into the master branch so that the application runs in the production environment after full-fledge development.
The user can also cut subsequent branches from the default feature branch (Feature_1). Thus, the user can add new features to the app and then create a release of one of the subsequent branches. Finally, the user can merge the release into the master branch.
You can generalize a number of cases to manage multiple branches simultaneously and continue the software development work.
This section primarily focuses on how to access and view the default feature branch.
To access the default feature branch:
- In the browser’s address box, enter the Vahana cloud’s login page’s URL.
- Press Enter, and the browser displays the login page.

- In the Email address box, enter the registered email ID.
- Click Continue, and the Password box comes into view.
- In the Password box, enter the password.
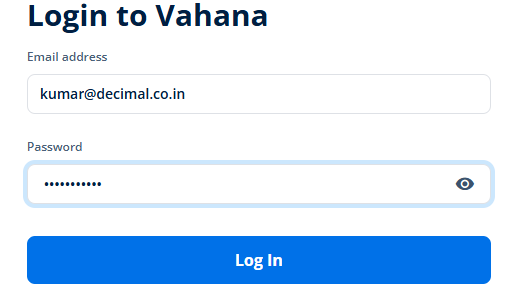
- After you enter the password, click Log In to display the Vahana cloud’s home page.
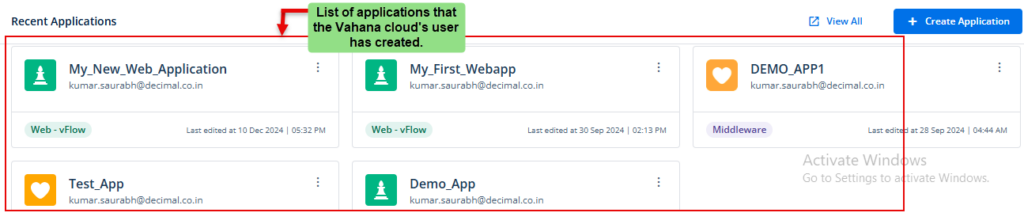
- On the home page, see the Recent Applications area.
- The Recent Applications area displays the list of recently created applications in tile format.
- Double-click an application’s name (for example, Demo_App) to display the Dashboard page.
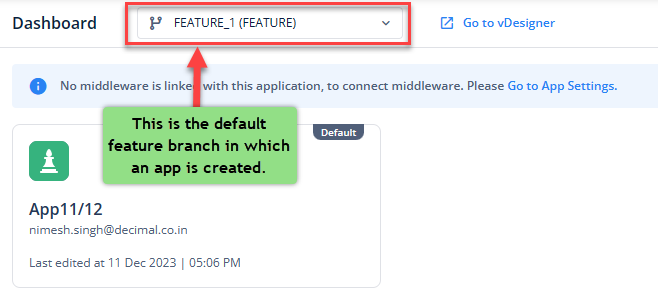
- On the Dashboard page, see the top panel.
- The top panel displays the Feature_1 branch (default feature branch), in which the app is created.
Note:- When you create a new app in the Vahana cloud, it is by default created in the Feature_1 branch.