
Assets Manager
Assets Manager is a smart web based virtual space dashboard that allows you to import and export the following items (file types):
- Image
- Video
- Audio
- Binary
In the Assets Manager module, these items are referred to as “assets“. You can use these assets in those web applications and mobile apps that you design and develop by using the vDesigner or vFlow module.
In Assets Manager, each asset is treated as a reusable component. For instance: – For several web applications and mobile apps that you develop by using vDesigner or vFlow, you use leading and trailing icons/images. You can import appropriate leading and trailing icons/images that you use in several under-development applications and mobile apps.
Assets Manager Dashboard
The web based Assets Manager dashboard consists of multiple utilities that are briefly described in the following table:
| Function/Utility | Description |
| Import | It imports the assets (image, video, and audio) from the local drive. |
| Export | It exports or downloads the asset item from the Assets Manager?s dashboard to the local drive. |
| Sort By | This function sorts and then displays the asset items on the basis of the following criteria: –> Name of the asset –> Storage Type ((sorts and displays the assets on the basis of two categories: Online and Offline) –> Date on which the asset was last updated |
| Image | This tab displays only image type assets. |
| Search Filter | In this box, enter the name of a specific asset to search it. |
| List Format Icon | Click this icon to display assets on the dashboard in the list format. |
| Tile Format Icon | Click this icon to display the assets on the dashboard in the tile format. |
Assets Manager Feature
Importing an Asset
This function allows you to import an asset from the local computer drive. To import an asset, you first need to select an asset from the local drive and then upload it to the Assets Manager dashboard. You can import the following asset types:
- Image
- Video
- Audio
- Binary
Note:- The Assets Manager module supports image uploads up to 10 MB in JPEG, PNG, WebP, SVG, and GIF formats. However, SVG and WebP are supported in vDesigner but not in vFlow 2.0.
Videos can also be imported, previewed within the interface, and subjected to basic actions.
To import an asset:
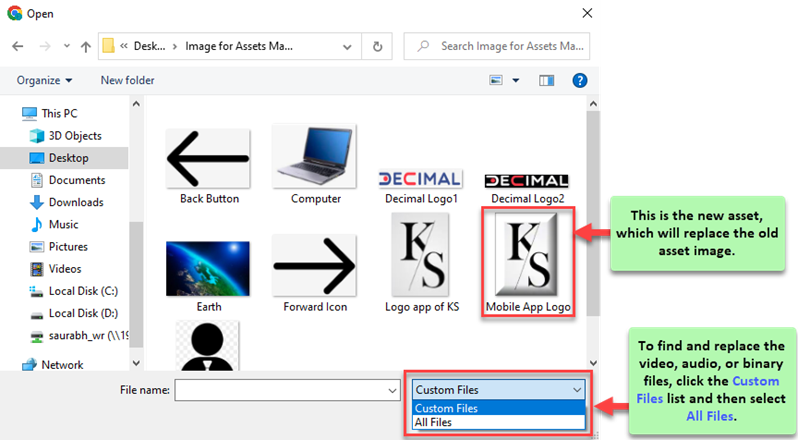
- On the Assets Manager dashboard, click the Import link, and the Open dialog box opens.
- In the Open dialog box, find the asset (Image, Video, Audio, or binary).
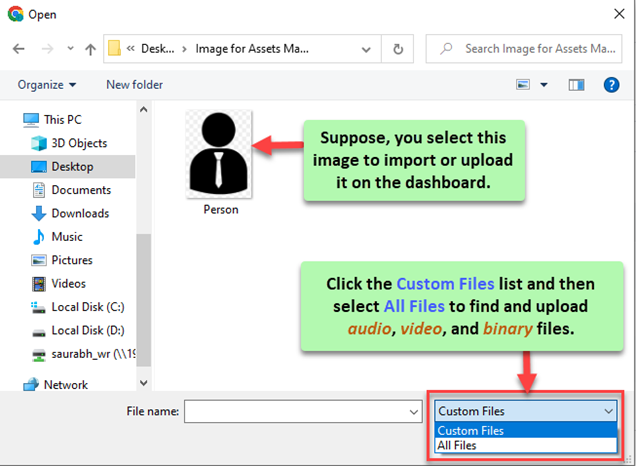
Note: – By default, the Open dialog box only displays the image files that you can find and then import. To find and then import the audio, video, and binary files, you need to click the Custom Files list and then select All Files.
- After you find the asset, click it and then click Open; the Edit Properties dialog box opens.
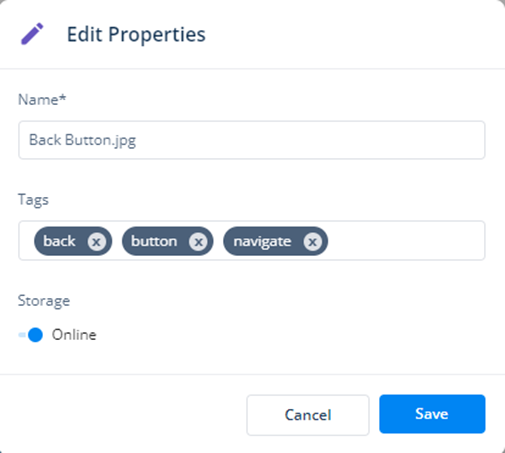
- In the Edit Properties dialog box, enter the values as follows:
| Property Type | Description |
| Name | This box displays the current name of the asset (For example: – Decimal Logo2.jpg). If you want, you can change the current name of the asset. |
| Tags | In this box: –> Enter an alphanumeric or alphabetic value (For example: – Decimal2) as a tag. –>Press Enter, the entered value starts appearing in the Tags box. You can use the tag to manage and search a specific asset or a group of assets among multiple assets. For instance:- To group and search image-type assets, you can use ?Image? as a tag value. You can also use the name of the month or a specific date to categorize the assets that are uploaded in a specific month or on a specific date. |
| Storage | Under Storage –> Click left to the bullet to select Offline if you want to bundle the assets with the APK (Android Application Package). –> Click right to the bullet to select Online if you want the application to fetch and display the assets in the application through the online mode or at the runtime. |
- After you enter the details of the asset, click Save, and Assets Manager starts importing the asset.
- After the asset is imported, the Assets Manager module displays the imported asset in the tile format or the list format.
Exporting an Asset
This function allows you to download the asset from the Assets Manager?s dashboard. The asset is downloaded in the compressed zip folder. To access the asset, you need to decompress the folder and then access the asset. You can export the following asset types:
- Image
- Audio
- Video
- Binary
After you export the zip folder of the downloaded files, you can use multiple zip application viewer such as window zip file viewer, winzip, RAR file extractor, etc. By default, the Assets Manager module allows you to decompress the zip folder through the window zip file viewer.
To export an asset:
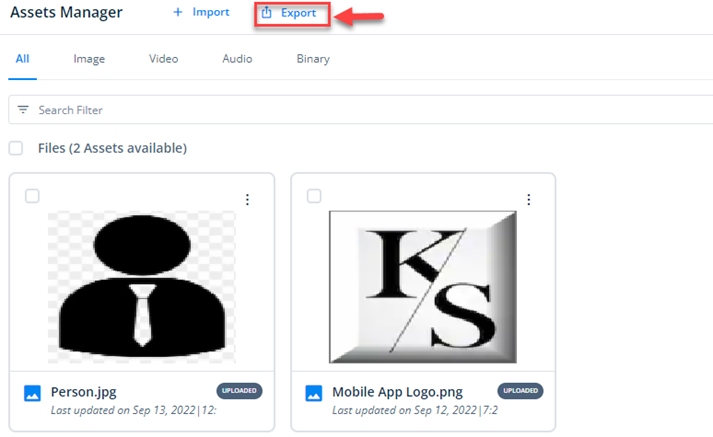
- On the Asset Manager dashboard, click the Export link, and the Asset Manager module downloads the zipped folder on your computer system.
- To access the zipped folder, press Windows logo key + E, and the File Explorer window opens.
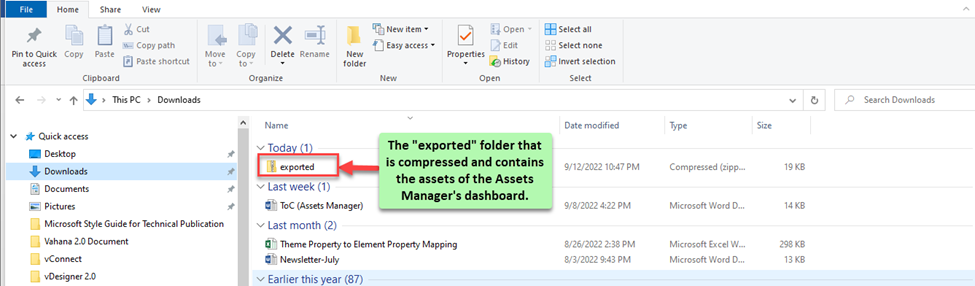
- In the File Explorer window, in the left pane, under Quick access, click Downloads, and the right pane displays the content of the Downloads folder.
- The Downloads folder contains the ?exported? folder.
- Right-click the ?exported? folder, point to 7-Zip, and then click Extract Here; the IMAGE folder is decompressed.
- Click the IMAGE folder to access the assets that you have exported from the Assets Manager.
Asset Management
Asset Manager?s dashboard is a web based centralized panel that allows you to manage multiple assets simultaneously. While viewing and monitoring these assets on the Asset Manager?s dashboard, you can also perform the following functions:
- Viewing the details of the asset
- Editing the details of the asset
- Replacing the current asset from any other asset
- Deleting asset
These features are broadly described as follows:
Viewing Asset’s Details
By using this feature, you can access the details of an asset. The details of an asset include the following:
- Name of the asset
- Storage type of the asset
- Resolution of the asset
- The date and time at which the asset was created or last updated.
- The upload status of the asset
To access and then view the details of an asset:
- On the Asset Manager dashboard, find the Search Filter box.
- In the Search Filter box, enter the name of the asset (For example: – person), and the dashboard displays the asset.
- The dashboard can display the assets in any of the two following view-mode:
- Tile View Mode
- List View Mode
Case1:- (If the dashboard displays the assets in the tile view mode)
- Click the tile of the asset, and the Info pane opens.
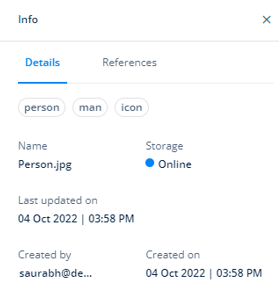
- In the Info pane, under Details, the details of an asset are described as below:
| Property (Details tab) | Description |
| <<Tag1>> <<Tag2>> <<Tag3>>??<<Tag?n?>> | Under the Details tab, in the upper section, the Info pane displays one or more tags (For example: – person, man, icon). You create these tags when you create an asset. The tags are used to categorize one or more assets. You can use the tag to search an asset or a group of assets. |
| Name | This field displays the name (For example: – Person) of the asset. |
| Storage | It can display any of the following values: –> Offline: – This value specifies that the user has bundled the asset with the APK file. –> Online: – This value specifies that the application will fetch and then display the asset during run-time. |
| Property (Reference Tab) | Description |
| Under the Reference tab, the Info pane displays the list of applications to which the current asset is linked. |
Case2:- (If the dashboard displays the assets in the list view mode)

- Under Name, find the asset (For example: – earth.jpg) to access its details.
- After you find asset, click the name of the asset, and the Info panel opens.
- The Info panel displays the details of the asset.
- To know more about the details of an asset, see the table after step5.
Editing Asset’s Details
This feature allows you to edit the details of an asset that was earlier imported to the Assets Manager. In the details of the Assets Manager, you can edit the following properties:
- Name of the asset
- Tag of the asset
- Storage
To edit the details of an asset:
- On the dashboard, search the asset as described from the step1 to the step3 in the section: Viewing Asset?s Details.
- After you search the asset, the dashboard displays the asset in any of the following modes:
- Tile View Mode
- List View Mode
Case1:- (If the dashboard displays the assets in the tile view mode)
- On the tile of the asset, click the three-dot (
 ) icon, and a context menu opens.
 - On the context menu, click Edit, and the Edit Properties dialog box opens and then displays the message: ?Do you want to edit <<asset name>>??
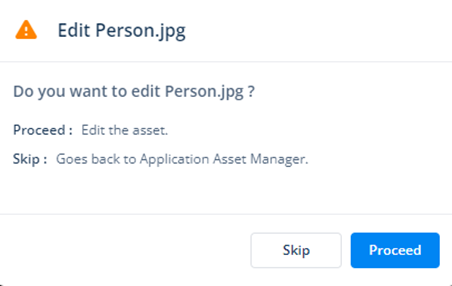
- On the Edit Properties dialog box, click Proceed, and the Edit Properties dialog box displays the details of the asset.
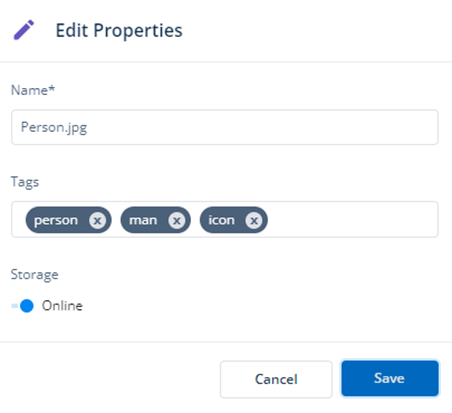
- In the Edit Properties dialog box, edit the details of the asset as follows:
| Property Type | Description |
| Name | This box displays the current name of the asset (For example: – person.jpg). If you want to change the name of the asset, you can change it. |
| Tags | In this box: –> Enter an alphanumeric or alphabetic value (For example: – person or man) as a tag. –> Press Enter, and the entered value starts appearing in the Tags box. You can use the tag to manage and search a specific asset or a group of assets among multiple assets. For instance: – To group and search image-type assets, you can use ?Image? as a tag value. You can also use the name of the month or a specific date to categorize the assets that are uploaded in a specific month or on a specific date. |
| Storage | Under Storage: –> Click left to the bullet to select Offline if you want to bundle the assets with the APK (Android Application Package). –> Click right to the bullet to select Online if you want the application to fetch and display the assets in the application through the online mode or at the runtime. |
- After you edit the details of the asset, click Save, and the asset is successfully edited.
Case2:- (If the dashboard displays the asset in the list view mode)

- Under Name, find the name of the asset to change its details.
- After you find the name of the asset, move the mouse pointer to the right in the same row and then click the three-dot icon (
 ); a context menu opens.
 - On the context menu, click Edit, and the Edit Properties dialog box opens.
- In the Edit Properties dialog box, edit the details of the asset as described in the table after step5.
Replacing an Asset
This function allows you to replace the current asset from another asset. When you choose to replace an asset, Assets Manager asks you to import another asset in place of the asset that you want to replace. After you import the new asset, the dashboard removes the current asset and starts displaying the asset that you have recently imported in place of the current asset.
To replace an asset:
- On the dashboard, search the asset as described from the step1 to the step3 in the section: Viewing Asset?s Details.
- After you search the asset, the dashboard displays the asset in any of the following modes:
- Tile View Mode
- List View Mode
Case1:- (If the dashboard displays the assets in the tile view mode)
- On the tile of the asset, click the three-dot () icon, and a context menu opens.
- On the context menu, click Replace, and the Replace <<Asset Name.extension name>> dialog box opens and then displays the message ?Do you want to replace <<Asset Name.extension name>>??
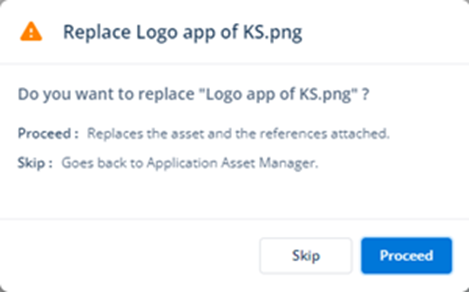
- In the Replace <<Asset Name.extension name>> dialog box, click Proceed, and the Open dialog box opens.
- In the Open dialog box, select a new asset to import.
- After you select an asset, click Open, and the Edit Properties dialog box opens.
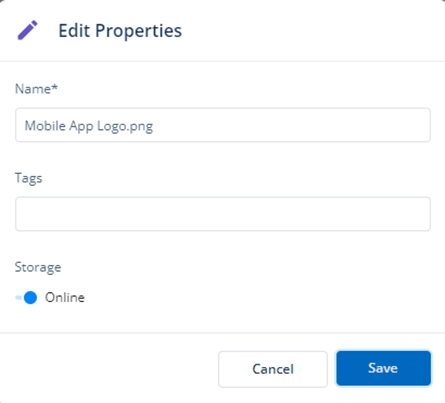
- In the Edit Properties dialog box, enter the details of the new asset as follows:
| Property Type | Description |
| Name | This box displays the current name of the asset (For example: – Mobile App Logo.png). If you want change the name of the asset, you can change it. |
| Tags | In this box: –> Enter an alphanumeric or alphabetic value (For example: – Decimal2) as a tag. –> Press Enter, the entered value starts appearing in the Tags box. You can use the tag to manage and search a specific asset or a group of assets among multiple assets. For instance: – To group and search image-type assets, you can use ?Image? as a tag value. You can also use the name of the month or a specific date to categorize the assets that are uploaded in a specific month or on a specific date. |
| Storage | Under Storage: –> Click left to the bullet to select Offline if you want to bundle the assets with the APK (Android Application Package). –> Click right to the bullet to select Online if you want the application to fetch and display the assets in the application through the online mode or at the runtime. |
- After you enter the details of the new asset, click Save, and the new asset replaces the current asset.
Case2:- (If the dashboard displays the asset in the list view mode)

- Under Name, find the name of the asset that you want to replace.
- After you find the asset, move the mouse point to the right in the same row and then click the three-dot icon (); a context menu opens.
- On the context menu, click Replace, and the Replace <<Asset Name.extension name>> dialog box opens.
- To replace the current asset, perform the steps from step5 to step9.
Deleting an Asset
This function allows you to delete an asset. You can delete an asset when you find that you do not want to use it in any of the under-development mobile apps or web applications. Based on the usefulness of an asset, you can decide if you want to remove it from the Assets Manager dashboard or want to archive it.
To delete an asset:
- On the dashboard, search the asset as described from the step1 to the step3 in the section: Viewing Asset?s Details.
- After you search the asset, the dashboard displays the asset in any of the following modes:
- Tile View Mode
- List View Mode
Case1:- (If the dashboard displays the assets in the tile view mode)
- On the tile of the asset, click the three-dot () icon, and a context menu opens.
- On the context menu, click Delete, and the Delete <<Asset Name.extension name>> dialog box opens.
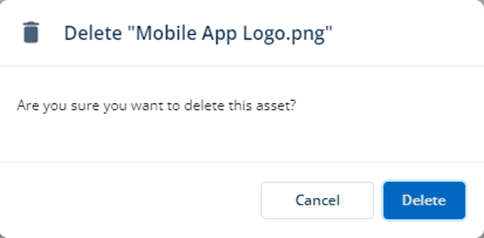
- In the Delete <<Asset Name>> dialog box, click Delete, and the asset is deleted.
Case2:- (If the dashboard displays the assets in the list view mode)

- Under Name, find the name of the asset that you want to delete.
- After you find the asset, move the mouse pointer to the right and then click three-dot icon (); a context menu opens.
- On the context menu, click Delete, and the Delete <<Asset Name.extension name>> dialog box opens.
- In the Delete <<Asset Name>> dialog box, click Delete, and the asset is deleted.