
Invite Member
This post is referring to Vahana 2 (beta version). To check the document for production, please go to vDesigner-v1.0
This function allows you to send an invitation request to a user. After you invite the user, the IAM module sends the invitation request to the user’s mail ID, and then the user is added as a member.
To invite a member:
- On the Team page, click Invite Member to display the Invite Member page.

- On the Invite Member page, enter values in related fields as follows:
| Box/List | Description |
| Email Address | In this box, enter the user’s email ID. After the user becomes a member of your workspace, this email ID is treated as the user’s registered email ID. |
| Name | In this box, enter the user’s name (for example, Nakul Anand). |
| Role | Click this list, and then select one of the following roles: a. Account Owner b. Workspace Owner c. Workspace Admin d. App Admin e. App Developer f. Devops Developer Note:- If you access the IAM module with one of the roles that is assigned to you, the Role list will not display account owner and workspace owner roles. It means that only a single user can be the owner of a Vahana account and workspace. |
| Resources | This list comes into view after you select a role (for example, app developer) in the Role list. This list allows you to select resources that a user can access with a specific role. This list contains the following values: a. All:- When you select this option, you grant the user access to all resources on the Vahana cloud. b. Select Resources:- Click Select Resources to grant the user access to a specific set of resources. You can use this functionality as follows: 1. Click the Resources list, and then click Select Resources, and the Select Resources for <<Role Name>> page opens. 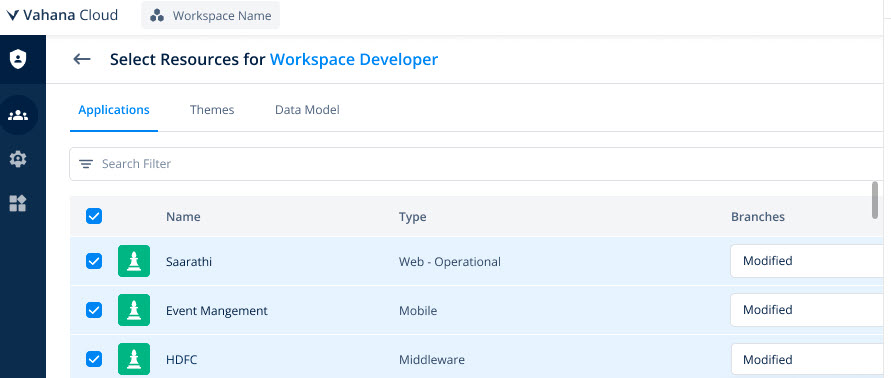 2. You can see that the Select Resources for <<Role Name>> page displays different resources (for example, Applications, Themes, etc.) by tab. 3. Click a tab (for example, Applications), and the page displays the list of different applications. 4. Under the Name column, find the application’s name so that you can grant access to the user to this application. 5. After you find the application’s name, click the related check box. 6. After you select the application, see the Branch column. 7. In the Branch column, click the Modified list in the same row, and then click the check box to select a branch (for example, Branch1) to grant access to the application in the this branch. 8. After you select the branch, see the Environment Permissions column. 9. In the Environment Permissions column, click Set in the same row, and the Environment Permissions dialog box opens. 10. In the Environment Permissions dialog box, you can see the list of permissions for the following environments: a. Dev b. Test c. Prod 11. In the Environment Permissions dialog box, you can perform the following functions under Dev, Test, or Prod: a. Switch on the toggle button to grant the permission b. Switch off the toggle button to revoke the permission Note:- By default, all permissions are granted to the user. If you want to restrict the user’s access, you can switch off the toggle button to revoke one or more permissions. 12. After you grant permissions to the user, click Save on the Environment Permissions dialog box. 13. Repeat steps from 4 to 12 to grant access to other applications. 14. After you grant user-access to one or more applications, click Save on the the Select Resources for <<Role Name>> page. |
- After you click Save, you successfully configure access to one or more resources.
Adding Another Role
In the IAM module, this function allows you to assign more than one role to the same user. You cannot assign the same role to the user twice. On the Invite Member page, the link for this functionality becomes active after you assign a role to the user.
To assign another role to the user:
- After you assign a role to the user, the Add another role link becomes active.
- Click Add another role to display the following fields:
- Role
- Resources
- Click the Role list, and then select a role (for example, Devops Developer).
- Click the Resources list, and then grant the user access to resources as described in the above table.
Note:- To know more about how to grant access to resources, see the last table that contains the description of Resources box/field.
- After you successfully assign the role to the user and grant him access to resources, click Save on the Invite Member page.
Was this article helpful?
YesNo