
Watermark
The Watermark functionality in the Open Camera Task in vDesigner allows users to overlay custom text or images on captured media. It can be used to embed tracking details, timestamps, and other identifiers in the video or image. Users can configure its position, alignment, and appearance based on requirements.
Use Cases
- KYC and Verification – To support identity verification processes during KYC, Watermark overlays tracking details, user information, and timestamps on images or videos.
- Fraud Prevention – By providing metadata such as location, and employee details, and capturing time, the watermark prevents unauthorized modifications.
When to use Watermark
The primary scenario in which Watermark can be used is to embed essential information on captured images or videos, ensuring authenticity and preventing unauthorized modifications. This helps in regulatory compliance, fraud prevention, and maintaining data integrity.
Key Highlight: The Watermark can be positioned either on the image or below it.
How to use Watermark in Open Camera Task:
- While defining Open Camera Execution Properties, click the watermark checkbox to enable the watermark.

- Define the following properties
| Watermark Position | Select the watermark position from the dropdown list: On Image and Below Image. |
| Watermark Alignment | Choose the alignment of the watermark. Note: Alignment dropdown list options vary based on the positioning that you selected above. |
| Watermark Text | Watermark Text can be fetched as follows: a. STATIC function:- Use the STATIC function and then manually define the file name of the watermark text in the STATIC function. b. Attribute:- It will fetch the value from the attribute to display in the watermark text. Click in the Watermark Text box, enter the attribute’s name, and then select it. c. Element:- Select an element that contains the Watermark Text. To know more about how to create an entity or attribute, click here. |
| Watermark Size | Define the size of Watermark in pixels (px). |
| Watermark Color | Choose a watermark color using a color picker or enter a hexadecimal or RGB color code. 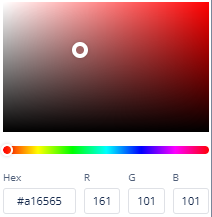 |
| Container Height | Define the Container Height here. *This will be defined when you select the Below Image positioning. Note: The maximum height of the container is set to be half the height of the image being captured by the camera, while the minimum height is set to be 1 px. |
| Container Background | Choose between Color and Image as the Container Background. *This will be defined when you select the Below Image positioning. |
| Color | If you chose a container background as Color, choose the Color of the background here using a color picker or enter a hexadecimal or RGB color code. *This will be defined when you select the Below Image positioning. |
| Image Source | If you select the container background as Image the Image Source. URL is the only source for now. *This will be defined when you select the Below Image positioning. |
| URL | Provide the URL of the image to be used as background here. *This will be defined when you select the Below Image positioning. |
Was this article helpful?
YesNo