
IS ALPHA
This function checks characters in a string-type value. When you use the ISALPHA() function to check characters in a string, you can fetch the string from an attribute or element. If it finds that the string contains only alphabetic characters, it returns the true Boolean value. If it finds that the string contains alphanumeric or numeric characters, it returns the false Boolean value.
When you want to use the ISALPHA function, you can implement it in a business rule or in other algorithm-based conditions. Before discussing the steps to implement the ISALPHA() function, let’s discuss where you can use this function while developing an application in the vDesigner module.
You can best use the ISALPHA function to apply a validation. This validation will check if the user entered only alphabetic characters in the input field. If the user enters alphanumeric or numeric characters, the application will display an error message. To implement this functional scenario, assume you have an application page.
On this application page, you have the Name input field and an ADD push button, in addition to other input fields.

If the user enters alphanumeric or numeric characters in the Name field and then clicks the Add button to submit the data, the application will display the error message. You can implement this functional scenario as follows:
First, create a business rule that contains the condition that will check if the user entered the alphabetic characters in the field.
The following section describes how to implement the ISALPHA function in a business rule.
Implementing ISALPHA Function in Business Rule
To implement the ISALPHA function in the business rule:
- On the vDesigner module’s dashboard, see the left navigation panel.
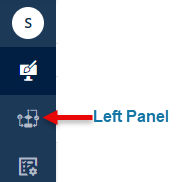
- Put the mouse pointer on the left panel to expand it.
- In the left panel, click Business Rules to display the Business Rules page.
- On the Business Rules page, click Create Business Rule to display the Create New page.
- On the Create New page, in the middle panel, in the Name box, enter the new business rule’s name (for example, Check Alphabets).
- In the right panel, see the IF block.
- Under the IF block, click in the When box to display the Search box and a group of tabs.
- Under the Search box, scroll right through the list of tabs and then click the Functions tab.
- In the Search box, enter static to display the STATIC function.
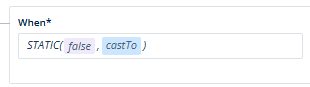
- In the list, select the STATIC function to display it with the value and String or castTo parameters.
- In the STATIC function, click the value parameter and then enter false in the place of the value parameter.
- In the STATIC function, click the seond parameter (for example, castTo or String) to display a context menu.
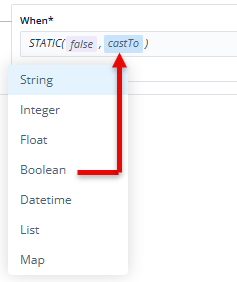
- In the context menu, click Boolean to select it.
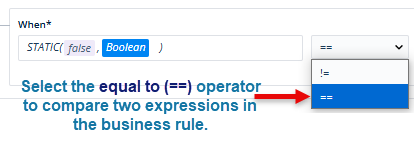
- In the IF block, click the middle box, and then select the equal to (==) operator to compare two expressions in the business rule.
- In the IF block, click the right box to display the Search box and a group of tabs.
- Under the Search box, scroll right through the list of tabs and then click the Functions tab.
- In the Search box, enter isalpha to display the ISALPHA function.
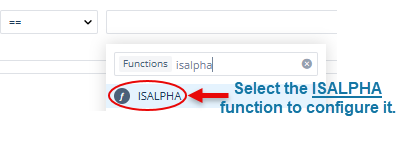
- In the list, select the ISALPHA function to display it with the string parameter.
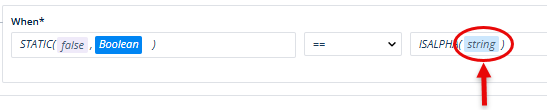
- In the ISALPHA function, click the string parameter and then do the following:
Case1:- (If you want to check a value in the element)
- Under the Search box, click the Element tab.
- In the Search box, enter the element’s reference name to display it in the smart selector.
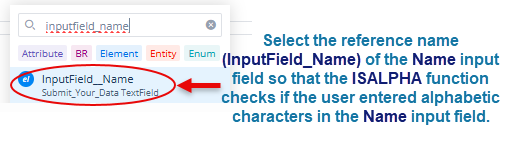
- In the list, select the element’s reference name (for example, InputField_Name).
Case2:- (If you want to check a value in the attribute)
- Under the Search box, click the Attribute tab.
- In the Search box, enter the attribute’s name to display it in the smart selector.
- In the list, select the attribute’s name.
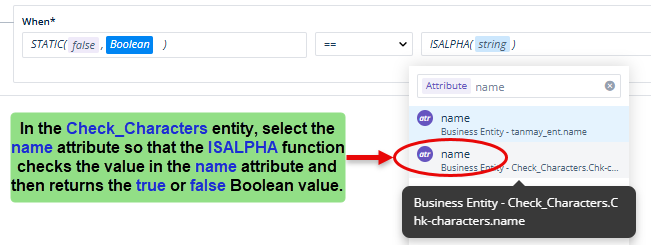
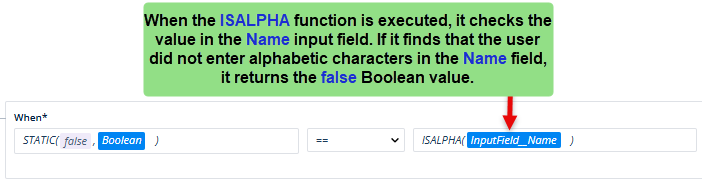
- After you select the element or attribute, click Create to create the business rule and define the condition in the business rule.
When the user’s action (the user does not enter alphabets) satisfies the condition in the business rule, the ISALPHA function returns the false Boolean value.
Configuring Task Group
After you create a business rule and define the condition to check if the user entered alphabets in the Name field, you need to configure a task in the task group. This configured task will display an error message if the user does not enter alphabets in the Name field, which automatically satisfies the condition in the business rule.
To configure the task in the task group:
- On the vDesigner module’s dashboard, see the left navigation panel.
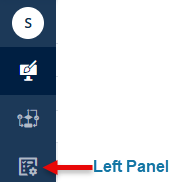
- Put the mouse pointer on the left panel to expand it.
- In the left panel, click Task Groups to display the Task Groups page.
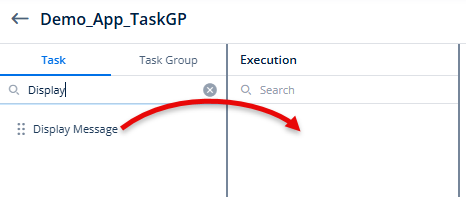
- On the Task Groups page, either click Create Task Group to create a new task group or double-click the name (for example, Demo_App_TaskGP) of the existing task group to open the <<task group name >> page.
Note:- To know more about creating a new task group, click here.
- On the <<task group name>> page, under the Task tab, search and find the Display Message task.
- After you find the Display Message task, drag it to the Execution panel.
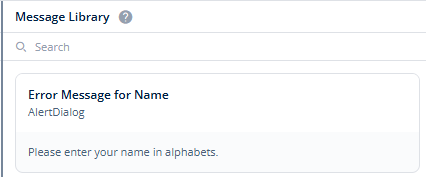
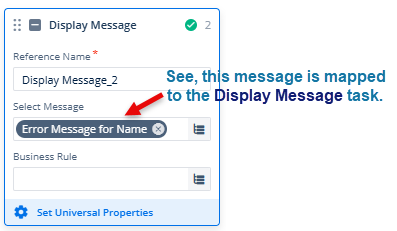
- Under the Display Message task, in the Select Message box, click the application tree icon (
 ) to display the Message Library panel.
 - In the Message Library panel, either click Create New to create a new message or click the existing message to select it.
Note:- To create and configure a new message, see the post, Creating a New Message.
- After you select the message, click Select to map it to the currently selected Display Message task.
- In the Business Rule box, click the application tree icon () to display the Business Rules panel.
- In the Business Rules panel, search and find the business rule to map it to the Display Message task.
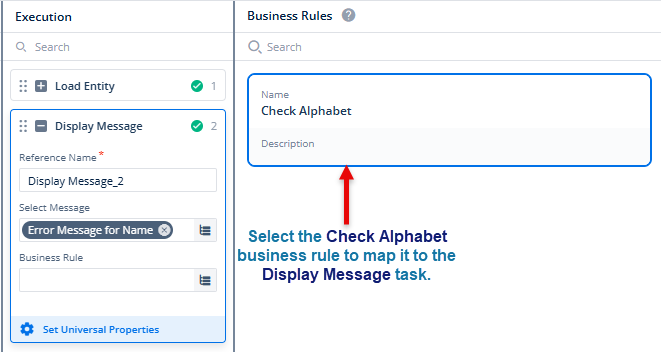
- After you find the business rule, click to select it, and then click Select to map it to the Display Message task.
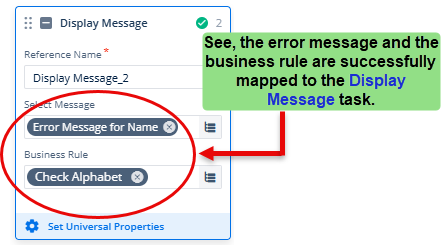
- After you successfully map the message and business rule to the Display Message task, click Save in the right panel to configure the Display Message task in the Demo_App_TaskGP task group.
After you configure the Display Message task in the task group, you can link the task group to the Add button on the application page.
Linking Task Group to Add Button
After you implement the ISALPHA() function in the business rule and map the business rule to the Display Message task in the Demo_App_TaskGP task group, you need to link the task group to the Add button.
After you link the Demo_App_TaskGP task group to the Add button, you successfully apply the ISALPHA() function to check and validate the value in the Name field.
If the end user enters alphabetic characters in the Name field and then clicks the Add button, the ISALPHA() function returns the true Boolean value. As a result of this user action, the application will not display the error message to the user and will perform another intended function.
If the end user enters alphanumeric or numeric characters in the Name field and then clicks the Add button, the ISALPHA() function returns the false Boolean value. As a result of this user action, the application will display the error message to the user.
To link the task group to the Add button:
- On the vDesigner module’s dashboard, on the related application page, find the element (for example, Add button) to link it to the Demo_App_TaskGP task group.
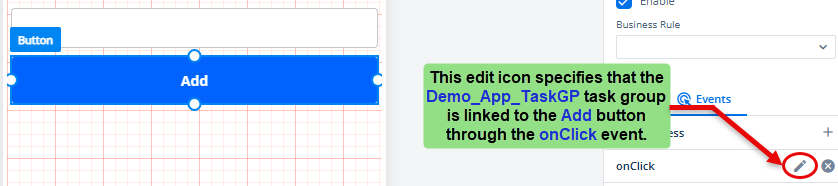
- Click the element (for example, Add button) to display its property panel.
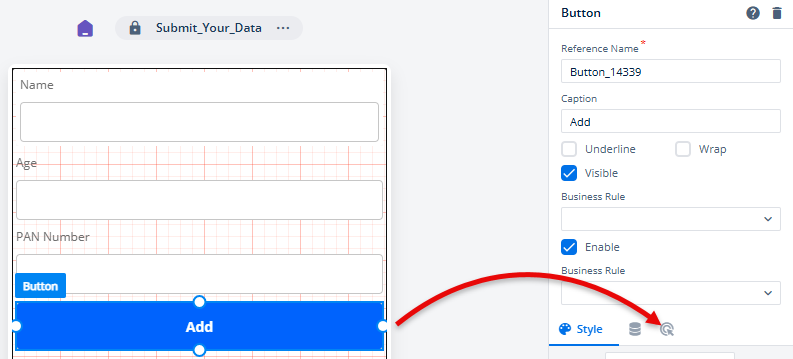
- In the Button panel, click the Events icon (
 ) to display the list of events.
 - In the list of events, find the onClick event.
- To the right of the onClick event, click the plus icon (
 ) to display the Event Configuration page.
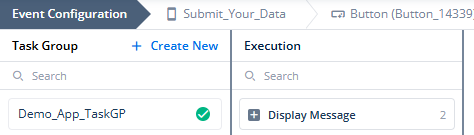
 - On the Event Configuration page, in the Task Group panel, search and find the task group (for example, Demo_App_TaskGP).
- After you find the task group (for example, Demo_App_TaskGP), drag it to the Execution panel.
- After you drag the task group to the Execution panel, it displays the task or the list of tasks that you configured in the task group.
- In the right panel, click Save to link the task group to the Add button.
The End Result
Case1:- If the end user enters alphabetic characters in the Name field and then clicks the Add button, the ISALPHA() function returns the true Boolean value. As a result of this user action, the application will not display the error message to the user and will perform another intended function.
Case2:- If the end-user enters alphanumeric or numeric characters in the Name field and then clicks the Add button, the ISALPHA() function returns the false Boolean value. As a result of this user action, the application will display the error message to the user.
Note:– This post described linking the task group to the onClick event of the Add button. If you want the ISALPHA function to check and validate the value when the end user enters it in the Name input field, you can link the task group to the onCompletion event of the Name input field. In this case, the ISALPHA function will validate the value after the end user enters it in the Name input field.