
Colors
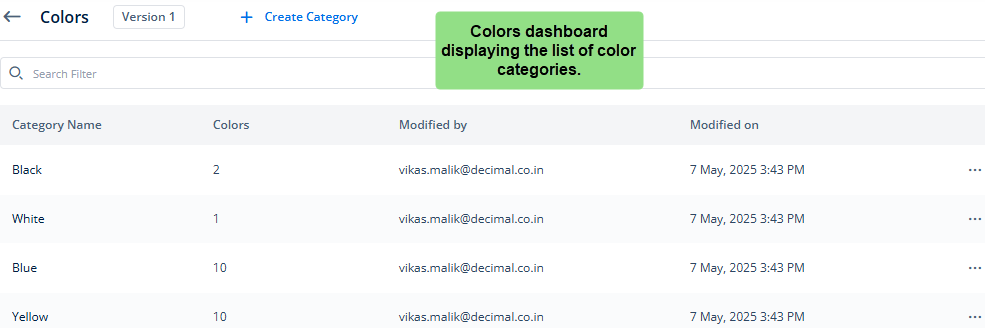
Under Themes, you can access the Colors submodule from the left panel. The Colors submodule displays a dashboard. In the dashboard, you can access the list of predefined color categories. The Themes module offers the following predefined color categories:
- Primary
- Neutral
- Red
- Green
- Yellow
- Blue
- White
- Black
On the Colors dashboard, you can do the following things:
- Adding a new color to the predefined color category
- Adding a new color category and then adding one or more custom colors to the new category
Based on the application design-related environment, you can choose to use the predefined color categories, or you can create a new custom category from scratch. On the Colors dashboard, you can use the predefined category or create a new category as follows:
Accessing Colors Submodule
To access the Colors submodule, see the list of available themes on the Themes page. In the list of themes, double-click the name (for example, Demo_Theme1) of the theme that you want to access. After you double-click the name of the theme, it displays the Colors dashboard.
If you created a custom color category earlier, the Colors dashboard will display the custom category in addition to the list of predefined categories.
Adding a New Custom Category
If you want to use a custom color category to design a new theme for the application, you need to create a new color category.
To create a new color category:
- On the Colors dashboard, see the top panel.
- In the top panel, click Create Category to display the Create Category dialog box.
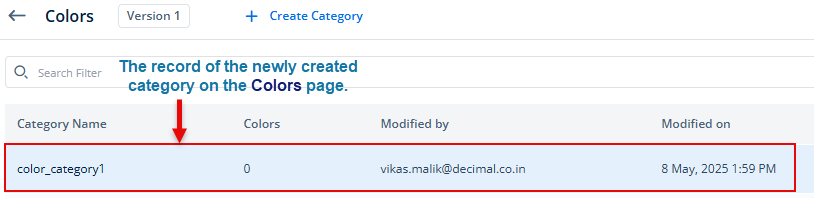
- In the Create Category dialog box, in the Name box, enter the name (for example, color_category1) of the category, and then click Create to create a new category.
After you successfully create a new category, the Colors page starts displaying its record.
Adding Color to Category
On the Colors page, you can define custom colors under a predefined color category or a custom color category. While creating a theme, you can choose a predefined category or a custom category to add a custom color or a set of custom colors. Choosing a color category and using the predefined color or custom color depends on the following factors:
- Theme-specific requirements
- Design-centric requirements of an application
To add a new color to the category:
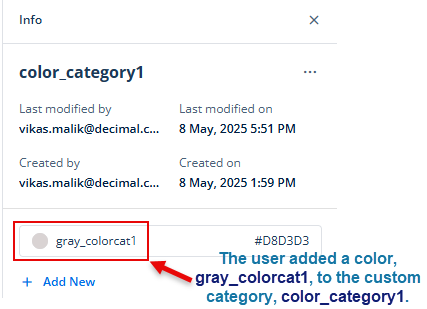
- On the Colors page, under Category Name, find a category (for example, color_category1) to add a color to it.
- After you find the category (for example, color_category1), click its name to display the Info panel.
- In the Info panel, click Add New to display the Add New dialog box.
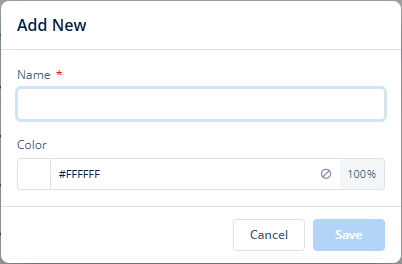
- In the Add New dialog box, enter the name of the color (for example, gray_colorcat1).
- In the Color box, you can define the color as follows:
By using the color configurator
- In the Color box, click the left section to display the color configurator.
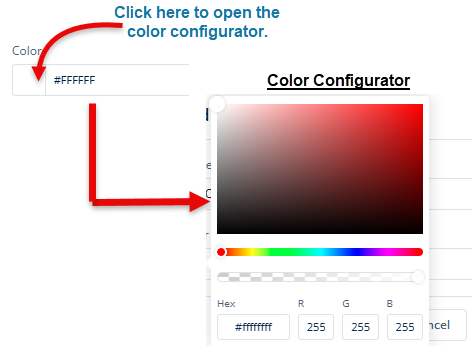
- In the color configurator, define a color as follows:
- On the canvas, move the circle to define the color tone (shade of color) of the selected color.
- On the upper bar (
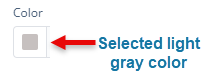
 ), move the circle to select the color (for example, light gray).
 - Click outside the configurator to select the color.
By entering a hexadecimal code (from step5)
- In the Color box, click in the middle section and then enter the hexadecimal value (for example, #d8d3d3) of the color.
- In the Color box, click the right section to define the opacity of the color as follows:
- 100% value means that the color is fully opaque.
- 0% value means that the color is fully transparent.
- After you select the color and define its opacity, click Save to add the color to the color category.
The Info Panel
On the Colors page, the Info panel comes into view after you click the name (for example, color_category1) of a color category in the list of categories. The Info panel displays the extensive details of a category. These details include the following:
- Name of category
- Registered email ID of the user who last modified the category
- Registered email ID of the user who created the category
- Date and time at which the user last modified the category
- Date and time at which the user created the category
- List of added colors, including name and hexadecimal value of the related color
- A See Reference icon (
 ) that displays a list of application pages where the user used the current color (Note:- The See Reference icon comes into view after you place the mouse pointer to the right of the hexadecimal value of the added color)
 - A three-dot icon (
 )
)
When you click the three-dot icon (![]() ), it displays a context menu. In the context menu, you can use the available menu items as follows:
), it displays a context menu. In the context menu, you can use the available menu items as follows:
| Menu Item | Description |
| Manage Colors | <<Menu Item is not working>> |
| Rename | Use this menu item to change the current name of the color category. To change the name of the color category: a. Click the Rename menu to display the Rename <<color category name>> dialog box. b. In the dialog box, in the Name box, change the current name of the category, and then click Update. |
| Duplicate | Use this menu to make a copy of the color category. When you make a copy of the color category, the copy or duplicate color category has the same set of colors that the original color category has. To duplicate the color category: a. Click the Duplicate menu to display the Duplicate <<color category name>> dialog box. b. In the dialog box, the Name box automatically displays the name (for example, color_category1_duplicate) of the duplicate category. c. If you want to edit the name of the duplicate color category, you can edit it. d. Click Duplicate to create the duplicate color category with the same set of available colors. |
| Delete | Use this menu item to delete the currently accessed color category. |