
Logs Snapshot and Restore
Introduction
In the VRT-specific ITOps module, this feature allows you to take and manage the backup of developer logs stored in the Elasticsearch engine. This backup mechanism is referred to as a snapshot. The developer logs contain data related to third-party APIs, REST APIs, and native Java-based services. This data is generated when the client applications consume these services.
Elasticsearch is a distributed, open-source search and analytical engine. Before the introduction of the Logs Snapshot feature, users lost the critical data in the Elasticsearch server as a result of the purging activity. In the Elasticsearch server, the purging mechanism purges the data periodically because the server has limited data storage capacity.
In case of problem resolution and regular data analysis, developer logs can be used for a long period, even after the server purges them. The Logs Snapshot and Restore feature allows you to take a snapshot of developer logs periodically and instantly. At a given point of time, you can restore a dataset that you archived through a snapshot if you want to use it.
To take the snapshot, you do the following:
- Register a repository
- Take an instant snapshot or
- Create a policy
After you create a policy, it runs at the scheduled time to take a snapshot of the data. You can also run a policy manually to take the snapshot. You can use the Logs Snapshot and Restore submodule as described in the Concept section.
Use Case
In the real-world scenario, you can use the Logs Snapshot and Restore submodule as follows:
- Long-term log retention to optimize the data storage cost in the Elasticsearch server
- Retaining logs for ‘n’ number of years related to regulatory and compliance purposes
- Maintaining data for on-demand historical analysis
- Retaining snapshots for data migration between the dev, test, and production environment, and others
Concept
Accessing Logs Snapshot and Restore Submodule
You can access the Logs Snapshot and Restore submodule in the VRT-specific ITOps module. To access the Logs Snapshot and Restore module:
- On the ITOps page, see the left panel.
- In the left panel, click the VRT Ops menu to display a list of menu items.
- In the list of menus, click Logs Snapshot and Restore to display the Logs Snapshot & Restore page.
Registering a Repository
This function allows you to register a repository. Registering a repository means creating a repository. You create a repository to allocate a virtual storage space to the snapshot. You can create a repository with the following predefined repository types:
- Local File System
- AWS S3
- Azure Blob Storage
Before you register a repository, you need to get the values of the following properties from the Infra team at Decimal Technologies.
- Client Name
- Bucket
- Container
- Shared File System and,
- Base Path
To register a repository:
- On the Logs Snapshot and Restore page, click Register Repository to display the Register Repository page.
- On the Register Repository page, enter the details of a new repository as follows:
| Box | Description |
| Name | In this box, enter a unique name for the new repository (for example, demo_repository). |
| Type | The Type area displays predefined types for the repository. While creating a repository, you can select one of the following repository types: a. AWS S3 b. Azure c. Shared File System |
| Client Name | In this box, enter the client name of the selected repository type. The client name is stored in the Elasticsearch server’s keystore. The client name helps the Elasticsearch server connect to the intended repository. |
| Bucket | This box comes into view if you select AWS S3 under Type. The “Bucket” term is also referred to as S3 bucket. The S3 bucket serves as a top-level folder where the snapshot is stored. |
| Container | This box comes into view if you select Azure under Type. Like S3 bucket, a container also serves as a top-level folder where the snapshot is stored. |
| Shared File System | This box comes into view if you select Shared File System under Type. In the Shared File System box, enter the location where the snapshot is stored. |
| Base Path | The Register Repository page displays this box if you selected AWS S3 or Azure under Type. In this box, enter a path that specifies a location where the snapshot is stored in the S3 bucket or Azure container. |
- After you enter details for a new repository, click Register to create a new repository.
After you successfully register a repository, the Logs Snapshot and Restore page displays the record of the newly created repository in the Repositories tab.
Creating a New Policy
This function allows you to create a policy. In a policy, you define a scheduler. The scheduler runs at the scheduled time to take the snapshot of the data automatically. You can configure the scheduler on an hourly, daily, weekly, monthly, and yearly basis. The Logs Snapshot & Restore module also allows you to run a policy manually, apart from the scheduled time.
To create a policy:
- On the Logs Snapshot & Restore page, click Create Policy to display the Create Policy page.
- On the Create Policy page, enter details for a new policy as follows:
| Box | Description |
| Name | In this box, enter a unique name for the policy (for example, mypolicy1). |
| Snapshot Name | In this box, enter a unique name for the snapshot (for example, mysnapshot1). After the policy takes a snapshot, it saves the snapshot in the repository with this name. To manage and identify a snapshot, the policy appends a 128-bit UUID (Universally Unique Identifier) to the snapshot name. The appended UUID helps distinguish one snapshot from the other. |
| Repository | Click the Repository list to select a repository. After the policy takes the snapshot, it stores it in the selected repository. |
| Choose Applications | This property allows you to select an application. After you select the application, the policy takes a snapshot of the selected application’s data. In the Choose Applications area, click the Workspace list to select a workspace. After you select a workspace, the Name tree displays all applications that were created under the selected workspace. In the Name tree, select one or more applications so that the policy takes the snapshot of the selected applications’ data. |
| Log backup offset days | In this box, enter a numeric value (for example, 5). This numeric value specifies the total number of days from the current date to a back date (for example, 10th March, 2024 to 5th March, 2024). By using the value of this property, the policy takes the data’s snapshot from the current date to the back date. The policy determines the current day or date based on the scheduled date. |
| Snapshot Schedule | This property allows you to schedule the execution of the policy. After you schedule the execution, the policy runs at the scheduled time. You can schedule the policy based on hourly, daily, weekly, monthly, and yearly criteria. |
| Snapshot Purging | This property allows you to configure the snapshot purging timeframe. After this timeframe, the Logs Snapshot & Restore submodule will purge the snapshot from the repository. Enabling this property keeps the repository’s storage space available for new snapshots. To define the purging timeframe: 1. In the Delete After box, enter a value (for example, 30 or 1450). This numeric value specifies the time frame in seconds, minutes, hours, and days. 2. Click the second list to select the unit of the snapshot purging timeframe (for example, days). |
| Snapshots to Retain | This property allows you to define the minimum and maximum number of snapshots that the repository can have at a time. 1. In the Minimum Count box, enter the minimum number of snapshots that a repository can maintain at a time. 2. In the Maximum Count box, enter the maximum number of snapshots that a repository can maintain at a time. |
- After you enter details in the related boxes, click Create to create a new policy.
Instant Snapshot
This function allows you to take a snapshot instantly. After you take a snapshot, the Instant Snapshot feature stores it in the repository.
To take the instant snapshot:
- On the Logs Snapshot and Restore page, see the top panel.

- In the top panel, click Instant Snapshot to display the Instant Snapshot page.
- On the Instant Snapshot page, enter details as follows:
| Box/Property Name | Description |
| Snapshot Name | In this box, enter a unique name for the snapshot (for example, Ins_snapshot1). When the Logs Snapshot submodule saves the snapshot in the repository, it appends the UUID (Universally Unique Identification) to the snapshot. The UUID helps distinguish one snapshot file from another. |
| Repository | Click the Repository list and then select a repository. After you select the repository, the Logs Snapshot submodule saves the snapshot in it. |
| Snapshot Logs | Under Snapshot Logs, select one of the following options: 1. All:- If you select this option, the Logs Snapshot module takes a snapshot of all applications for a configured timeframe. 2. Custom:- If you select this option, the Logs Snapshot module takes a snapshot of a selected application in a workspace. When you select the Custom option, perform the following steps: a. In the Choose Applications area, click the Workspace list to select a workspace. b. After you select a workspace, the Name tree displays all applications that were created under the selected workspace. c. In the Name tree, select one or more applications so that the policy takes a snapshot of the selected applications’ data. |
| Log Backup Duration | This property allows you to define a duration to take the data’s snapshot. After you configure the duration by selecting a start date and end date, the Logs Snapshot submodule takes the data’s snapshot from the selected start date to the selected end date. |
- After you enter details to take a instant snapshot, click Create to create a new instant snapshot job.
Restore Snapshot
This feature allows you to restore the snapshot’s data in the Elasticsearch server. After you perform the restore function, it moves the snapshot’s data from the repository to the Elasticsearch server.
To restore the snapshot:
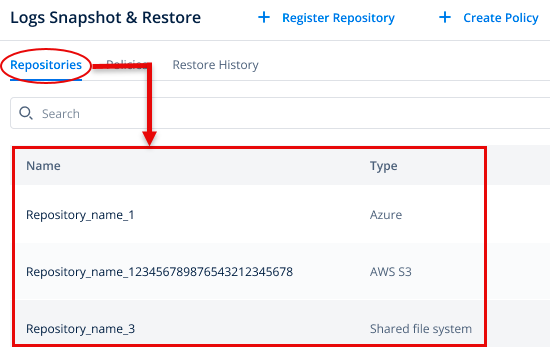
- On the Logs Snapshot and Restore page, click the Repositories tab to see the list of repositories.
- In the list, under Name, find a repository to access a snapshot in it.
- After you find the repository, click its name to display the <<Repository Name>>: Snapshots page.
- The <<Repository Name>>: Snapshots page displays the list of snapshots taken earlier by using the instant snapshot function or policy.
- In the list, under Name, find a snapshot that you want to restore.
Note:- You can find a snapshot by using the name of the policy or the snapshot creation date.
- After you find the snapshot, move the mouse pointer on its record to the right and then see the three-dot icon (
 ).
). - Click the three-dot icon to display a context menu.
- In the context menu, click Restore to display the Restore: <<snapshot name>> page.
- On the Restore: <<snapshot name>> page, do the following to restore the selected snapshot:
| Property | Description |
| Restore All Logs | Click this check box if you want to restore all logs in the Elasticsearch server. When you click the Restore All Logs check box, it moves all logs from the repository to the Elasticsearch server. |
| Choose Applications | In the Choose Applications area, select a workspace and then one or more applications in the selected workspace to restore snapshots of selected applications. Under Choose Application: In the Choose Applications area, click the Workspace list to select a workspace. b. After you select a workspace, the Name tree displays all applications that were created under the selected workspace. c. In the Name tree, select one or more applications to restore snapshots of the selected applications. |
- After you select the details to restore the snapshot, click Restore to restore the snapshot in the Elasticsearch server.