
Rich Text Editor
This post is referring to Vahana 2 (beta version). To check the document for production, please go to vDesigner-v1.0
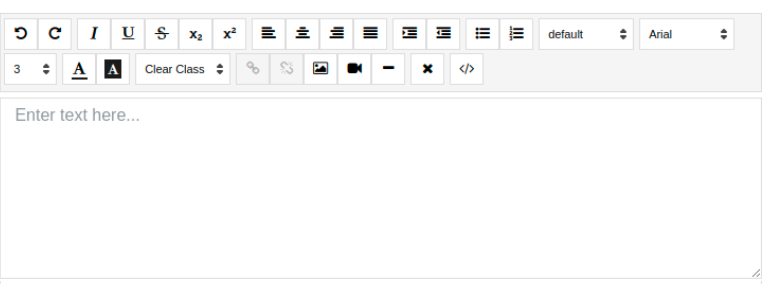
The Rich Text Editor element allows you to compose, edit, and store the formatted text, in addition to images, fonts, and other elements. The vDesigner incoprorated rich text editor contains all features of a WYSIWYG (what you see is what you get) editor.
It provides you all word processing features to write and compose the rich content. It includes the following:
- Bold, Italic, and other styles
- Alignment to align the content
- Undo, redo features
- Different font types (Serif and Sans Serif)
- Content indentation
- Insert picture feature, and others
Usage
| When to use | When not to use |
| You can use the Rich Text Editor element when 1. you want to highlight content 2. you want to pull the user’s attention to a specific content or section 3. you want to represent the content decoratively 4. you want to display special hyperlinks or multi-line paragraphs | You should not use the Rich Text Editor element when 1. you want to display only single line information 2. you display simple not-so-important content |
Rich Text Editor Configuration
The “Rich Text Editor” element contains the following properties:
- UI Configuration
- Data Configuration
UI Configuration
For the “Rich Text Editor”, you can configure the following properties:
| Tab | Property Name | Description | Mandatory | New Default Value | Visibility Rules |
| Basic | Reference Name | Specifies a unique name of the element. At the application level, an element is identified and managed by the reference name. | Yes | Richtext_ XXXXX | |
| Basic | Open Editor | ||||
| Basic | Enable | By default, this check box is selected, the related page displays the timer element as an active element. | Selected Check box | ||
| Basic | Visible | If you click this check box, the related page does not display the timer element. | No | ||
| UI Properties-Style | Styles | Allows you to select a specific style for the element from the list of pre-defined styles. The vDesigner module offers pre-defined styles that you can apply to the element. | No | Default | |
| UI Properties-Style | Background | This property allows you to define the background color of the Rich Text Editor element. To define the background color: 1. Click in the left Color box ( 2. On the canvas, on the horizontal bar, move the circle to select the color. 3. In the upper section, move the circle to select the tone of the color. | No | #FFFFFF | |
| UI Properties-Alignment and Spacing | Margin | Allows you to desirably define margin around each side of the element. It provides four different boxes to define the margin outside the right, left, top, and bottom border of the element. | No | 4 | |
| UI Properties-Alignment and Spacing | Padding | The padding defines the space between the element’s content and each side of the element. It provides four different boxes to define the padding around the right, left, top, and bottom side of the element’s content. | No | 0 | |
| UI Properties-Shape and Decoration | Type | Under the Shape and Decoration section, this property has the two following options: Autofill:- If you select this option, the element will occupy the available space of the parent layout. Manual:- If you select this option, you can define a specific size of the element. | Yes | Autofill | |
| UI Properties-Shape and Decoration | Width Value | Enter the width of the element in the pixel unit or percentage unit. | |||
| UI Properties-Shape and Decoration | Height Value | Enter the height of the element in the pixel unit. | No | ||
| UI Properties-Shape and Decoration | Border Radius | Allows you to define the radius of any of the corners of the element. Defining the radius of the corner makes the corner of the element round. | No |
Data Configuration
| Tab | Property Name | Description | Mandatory | New Default Value | Visibility Rules |
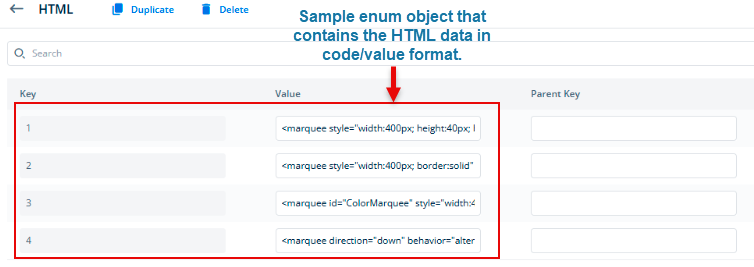
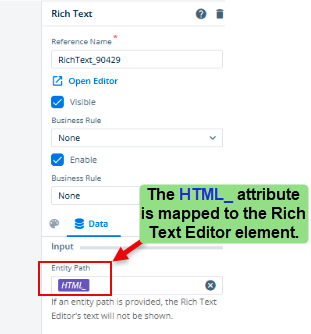
| Data Properties-Input | Entity Path | This property allows you to map the entity or its attribute to the element if you want to fetch the HTML embedded data from the entity and then display it in the element. To implement this functionality, you can do the following: 1.Create an enum object that contains the HTML data stored in the code/value pairs. (Click here to see the sample enum object) 2. Create an entity that will store the data copied from the enum object. 3.Configure the Copy Data task to copy the data from the enum object to the entity. 4. In the Entity Path box, map the entity’s attribute to the rich text element. |
-> Sample enum object
-> Entity’s Attribute Mapping to Element
Was this article helpful?
YesNo