
Applications
After you log in to the Vahana front-end for the very first time, you automatically access the Vahana portal in your default workspace. The default workspace is created when you register with the Vahana front-end. After you access the Vahana front-end’s home page in your default workspace, you need to create an app.
On the Vahana front-end, the term “App” means a virtual application-based container. When you access this app container, it allows you to access Vahana front-end incorporated applications and services. In an app, you can perform the following functions:
- Accessing Vahana cloud incorporated applications and services
- Developing web application and mobile apps by accessing the vDesigner module
- Deploying API in the vConnect module
- Downloading build, etc.
Functionally, an app allows you to start and develop only one software application in the vDesigner module. By using a single app, you cannot create and develop multiple applications in the vDesigner module. To develop two or more applications in the vDesigner module, you need to create different new apps. Thus, you can access a newly created app and then access the vDesigner module to develop a new software application.
Note:- The app’s name is treated as the new application’s name in the vDesigner module.
In a workspace, you can create multiple apps. The Vahana front-end manages each component, including a user account, workspace, app, and others, by assigning a unique ID. It manages the workspace with a unique workspace ID. Similarly, it manages the app with a unique app ID.
When you create an app, Vahana front-end also allows you to connect the new app to the middleware. After you connect a new app to the middleware, you can perform the following functions:
- Create a build of new application that is developed on the vDesigner module
- Consume the API deployed on vConnect
- Access other Vahana incorporated resources such as vConnect, Release Manager, VRT, etc.
Create an App
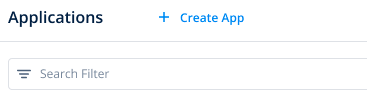
- There are two ways to create an application. The first way is to create an application from the Vahana front-end’s home page. Click Create an App, and the Create Application dialog box opens. The other way is to click “Applications” on the right panel.
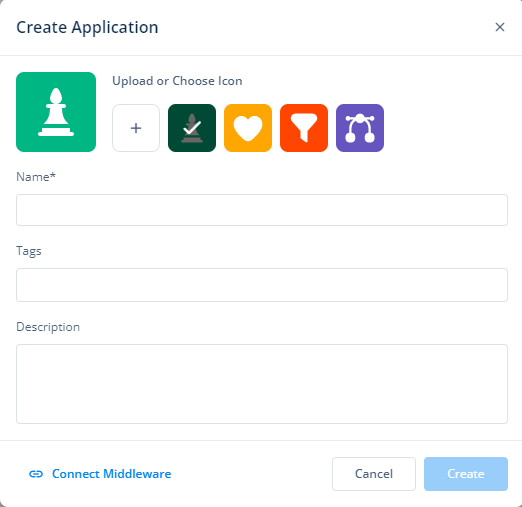
- On the Create Application dialog box, perform the following functions:
- Click the plus icon (
 ) to upload the app’s logo or use the Vahana-offered logo.
 - In the Name box, enter the app’s name (For example:- My New Demo App).
- In the Tags box, enter one or more tag names (For example:- Demo, App).
- In the Description box, enter the brief description of new app (Optional step)
- Click the plus icon (
Note:- The tags are used to manage and search an app or group of apps.
- After you enter the app’s details, click the Connect Middleware tab, and the Connect Middleware area appears.
- In the Connect Middleware area, click Go to Middleware, and the Vahana middleware’s login page opens.
- On the login page, enter your registered email ID, and then the Password box appears.
- In the Password box, enter your password and then click Login, and the Vahana middleware’s home page opens.
- On the top-right corner, click the user name, and then click the Copy icon (
 ) to copy the Org ID.
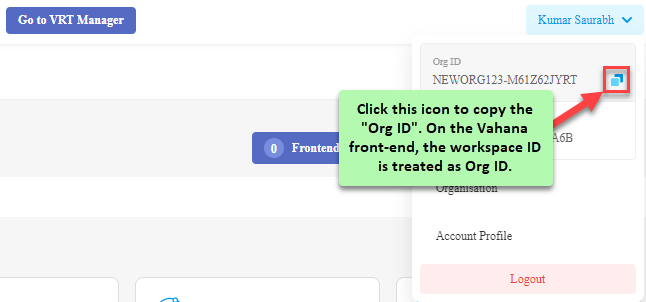
Note:- On the Vahana middleware, the workspace is managed by the Org ID. On the Vahana front-end, the workspace is managed by the workspace ID.
- After you copy the Org ID, switch to the Vahana front-end home page window.
- On the Create Application dialog box, click in the Org ID box, and then right-click, and a context menu opens.
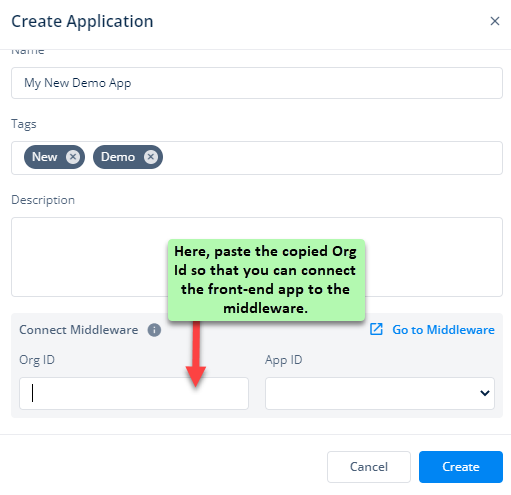
- In the context menu, click Paste, and the Org ID box displays the Org ID (workspace ID) that you have created on the Vahana middleware.
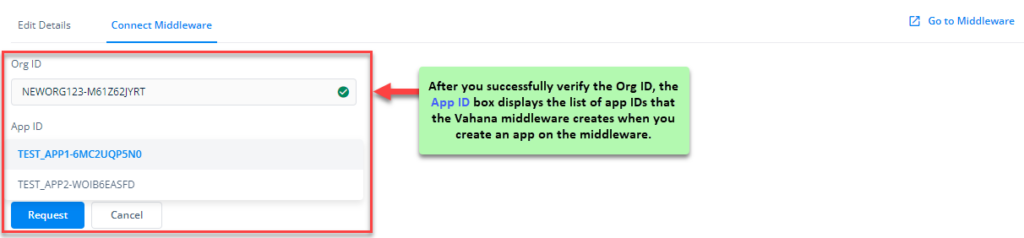
- Click Verify to verify the org id, and a tick mark appears and then indicates that the org ID is successfully verified.
- After you verify the org ID, the App ID box displays the list of apps that you have created under the verified Org ID.

- In the App ID box, select an app ID, and then click Create to create a new app.
Approving Front-end Middleware Connection Request
While creating a new app, when you connect the app to the middleware, the Vahana front-end application sends the connection request to the Vahana middleware. The Vahana portal sends the connection request to the admin of the app. Thus, in the middleware portal, you need to access the app with the app Id that you selected in the App Id box when you created the app on the Vahana front-end application. The middleware admin needs to access the middleware portal and then access the related app to approve the connection request as follows:
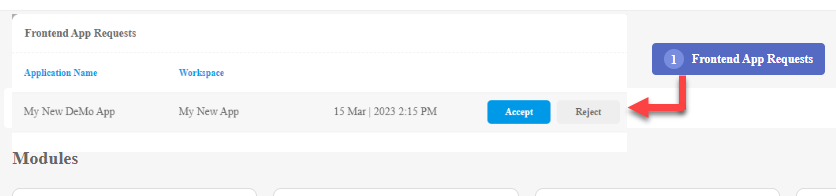
- On the Vahana middleware’s home page, click Frontend App Requests, and the Frontend App Requests dialog box opens.
- On the Frontend App Requests dialog box, click Accept to approve the request.
Connecting Existing Application to Middleware
When you create an app on the Vahana front-end, you can create it without connecting it to the middleware. In this case, you will successfully create the app, but you will not succeed to create a build of the application, consume and API, and other functions. While creating an app, you may decide to connect it to the middleware later.
To connect an existing app to the middleware:
- On the Vahana front-end dashboard, click an existing app that is not connected to the middleware.
- On the dashboard, click the app (For example:- My Test App) that you want to connect to the middleware, and the app dashboard opens.
- In the left panel, click the App Settings icon (
 ), and the App Settings page opens.
 - On the App Settings page, click the Connect Middleware tab.
- On the App Settings page, click Go to Middleware, and the Vahana middleware’s login page opens.
- To connect the app to the middleware, perform the steps from step 5 to step 12 that the Create a New App section describes.
- After you perform the steps from step 5 to step 12, the App ID box displays the list of the middleware-incorporated apps’ ids.
- In the App ID box, select an app ID, and then click Reqest, and the Vahana front-end sends the connection request to the Vahana middleware.
After you send the connection request to the middleware, you need to access the middleware.
Deleting an App
The Vahana portal’s dashboard also provides you a feature to delete the existing app. After you delete the app, app-level connections, such as the app’s connection to a middleware, the app’s connection to a data model, and others, are also deleted.
When you perform the function to delete an app, the Vahana portal allows you to delete the application after double-verification steps. When you click the element to delete the app, Vahana portal displays a dialog box that asks you if you want to delete the app. If you decide to delete the app, the portal sends a unique OTP to your registered email ID.
After you enter the unique OTP and perform the function to delete the app, the portal verifies the OTP and then lets you delete the app.
To delete an app:
- On the Vahana portal’s dashboard, click in the Search Filter box.
- In the Search Filter box, enter the app’s name (for example, Kotak Mobile Banking).
- Press Enter to search the app’s name, and the portal searches the app.
- If the portal finds the app, it displays it in tile format.
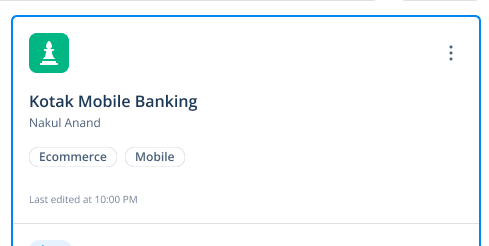
- On the app’s name’s tile, see the vertical three-dot icon.
- Click this three-dot icon, and a context menu opens.
- On the context menu, click Delete App, and the Delete Application dialog box opens.
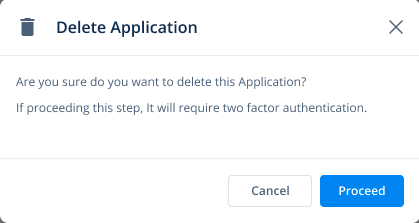
- On the Delete Application dialog box, click Proceed, and the Vahana portal performs the following functions:
- It sends a unique OTP to your registered email ID
- It displays the “Verify OTP” dialog box so that you can enter the OTP
- Access your registered email ID and then find the OTP that the Vahana portal sent to you.
- On the Verify OTP dialog box, in the Verification Code box, enter the OTP that you received on your registered email ID.
- After you enter the OTP, click Verify & Delete to delete the application.
Disconnecting App from Middleware
The Vahana front-end portal allows you to disconnect an existing app from the middleware by using the following scenarios:
When User Disconnect Middleware from Front-end App
Case1:- (When the admin of the front-end application and middleware portal is same)
The Vahana front-end application’s user can disconnect the app from the middleware by clicking the Disconnect button in the dialog box.
- On the Vahana portal’s dashboard, double-click the application’s name, and the application-related dashboard opens.
- On the dashboard, see the left panel and then click the App Settings icon (), and the App Settings page opens.
- On the App Settings page, click Disconnect, and the Disconnect Middleware dialog box opens.
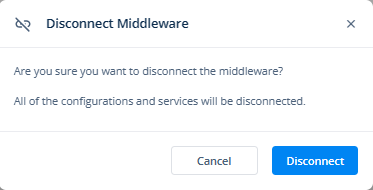
- In the Disconnect Middleware dialog box, click Disconnect to disconnect the app from middleware.
Case2:- (When the admins of the front-end application and middleware portal are different)
The Vahana front-end application’s user cannot disconnect the app from middleware by clicking the Disconnect button in the dialog box. When the user clicks the Disconnect button, the Vahana front-end application sends a request to the middleware portal’s admin.
To send the disconnection request:
- On the Vahana portal’s dashboard, double-click the application’s name, and the application-related dashboard opens.
- On the dashboard, see the left panel and then click the App Settings icon (), and the App Settings page opens.
- On the App Settings page, click Disconnect, and the Disconnect Middleware dialog box opens.
- In the Disconnect Middleware dialog box, click Disconnect, and the front-end application sends the disconnection request to the middleware portal’s admin.
- In the right panel, click the Middleware icon (
 ), and the middleware portal’s log in page opens.
 - Access the middleware, and then see the left panel.
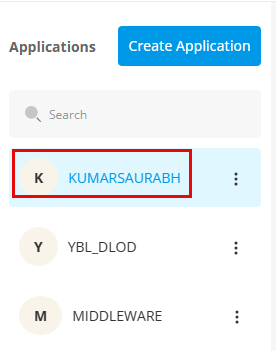
- In the left panel, click the application where you want to approve the request, and then click Frontend App Requests, and the Frontend App Requests box opens.
- In the Frontend App Requests box, see the request to disconnect.

- After you find the request, put the mouse pointer on the request, and then click Accept to approve the disconnection request.
When User Disconnect Middleware from Middleware
Case1:- (When the admin of the middleware portal and frontend application is same)
The application user can disconnect the middleware by clicking Disconnect Middleware in the dialog box.
- Access the middleware, and then see the left panel.
- In the left panel, click the application where you want to approve the request, and then click Frontend App Requests, and the Frontend App Requests box opens.
- In the Frontend App Requests box, see the request to disconnect.
- After you find the request, you can disconnect the frontend from the middleware in the dialog box.
Case2:- (When the admins of the front-end application and middleware portal are different)
If the admins of the front-end application and middleware portal are different, the user cannot disconnect the middleware from the frontend on the middleware portal. In this case, when the user clicks Disconnect, the middleware portal sends the disconnection request to the front-end application’s administrator.
To approve the disconnection request on the front-end portal:
- On the Vahana portal’s dashboard, double-click the application’s name, and the application-related dashboard opens.
- On the dashboard, see the left panel and then click the App Settings icon (), and the App Settings page opens.
- On the App Settings page, click the Middleware tab.
- In the Middleware tab, see the box that displays the text message: “Middleware” requested to disconnect the middleware.
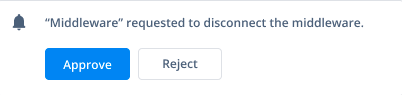
- In the box, click Approve to disconnect the middleware from the front-end application.
Sync Module
The Vahana portal (frontend application) provides the “Sync Module” feature to deploy changes, enhancements, or new development from the current branch to a destination branch. You can deploy the changes across the following environments that you configure by using the VRT (Vahana Runtime) module.
- Developer
- Test
- Prod
Under these available environments, you can deploy the changes to the following branches:
Case1:- (If the environment is: Developer or Test)
You can deploy the changes to the following destination branches:
- Feature
- Integration
- Release
- Master
Case2:- (If the environment is: Prod)
You can deploy the changes to the following destination branches:
- Master
- Release
To deploy the changes:
- On the Vahana Home page, find and double-click the application, and application-related dashboard opens.
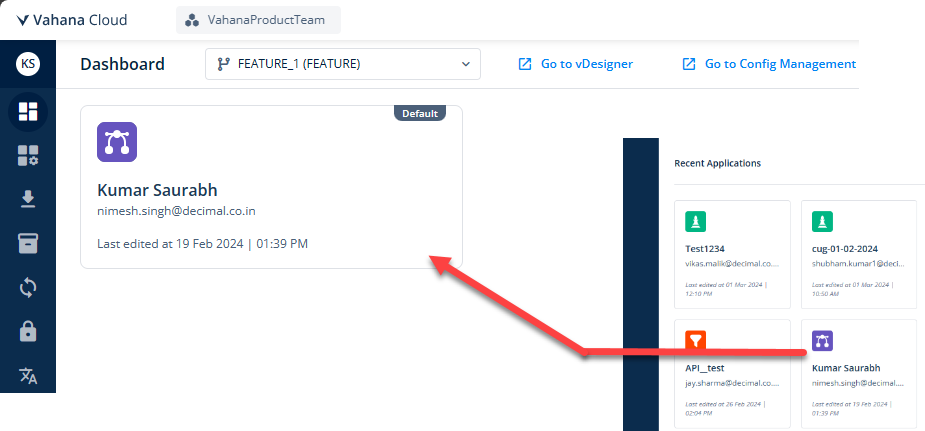
- On the application-related dashboard, see the left navigation panel.
- In the left navigation panel, click the Sync icon (
 ), and the Sync page opens.
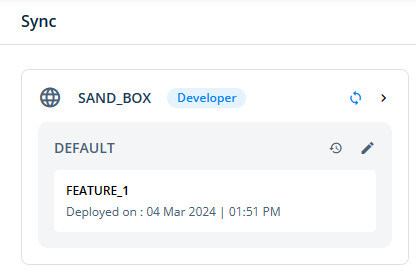
- On the Sync page, see the Sand_Box card.
- On the Sand_Box card, click the Edit icon (
 ), and the Map Branch on Sand_Box dialog box opens.
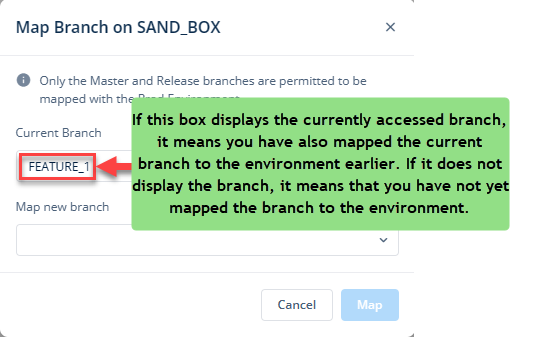
 - In the Map Branch on Sand_Box dialog box, the Current Branch list displays the currently accessed branch.
Note:- If you access the Sync module for the first time, the Current Branch list will not display a branch. The reason for not displaying the current branch is that you have not yet mapped a branch to the environment.
- Click the Map new branch list, and then select a branch (for example, Master or Release) where you want to map the changes.
- After you select a branch in the Map new branch list, click Map to successfully map the changes.